
There is a lot you can customize in the Nuke interface using Python and many new nodes you can create with gizmos, expressions, and Blinkscript.
There are also many limitations that can only be lifted by digging deeper and getting into the world of the Nuke Development Kit (a.k.a. NDK), the C++ API for Nuke. That’s a scary world for the uninitiated.
I tried to learn many times over the years, only to give up after failing to set up the dependencies, or not being able to figure out how to compile.
I only restarted my NDK journey after SIGGRAPH 2022 (about 15 months ago as I write this), so I’m still pretty new to this myself, but now that I’m getting to know some of the basics, I feel like I can share some of what I learned with others who may be interested.
The scarce resources on this topic do make it intimidating at first.
I would definitely not call myself an expert at this point, and seasoned C++ developers will likely find multiple inaccuracies or inefficiencies in what I will explain in this series of articles.
The target of these articles is Artists or TDs already familiar with Nuke, with some Python programming knowledge, but zero NDK experience.
I will not be teaching the basic syntax of C++, so you may have to read up on that if not familiar to follow along some of the next articles (we won’t get into it in this intro yet).
There is no need to be an expert C++ user (I’m not myself), but you should look at the syntax for loops, conditions, variable declarations, making classes, and read a little bit about pointers and references.
Table of Contents
What is the NDK for, and what is it not for?
The NDK is principally used to write Ops (Operators) which are the image processing part of a Nuke Node.
One or multiple Ops can be put together as a node.
I could have simplified this by saying that the NDK is to create new Nodes, but at the API level what you’re really writing is Ops.
The NDK documentation has a short paragraph explaining the difference between Opts and Nodes: https://learn.foundry.com/nuke/developers/63/ndkdevguide/intro/oparchitecture.html#intro-fundamentalconcepts-nodesvsops
It’s important to note that while Nuke is presumably entirely written in C++, the Op API seems to be the only thing that has been exposed to developers, and if you’re trying to do anything beyond making new nodes, the Python API might offer more options.
As far as I know, you can’t customize your UI in C++, add callbacks, create menus, etc…
It does offer more options than Blinkscript, as you can make different types of Nodes/Ops: 2D, 3D, Deep, Particles, Volumes (See Eddy for Nuke), etc…
It also requires more work than writing a Blink Kernel because you must set up a whole development environment and figure out how to compile it before you even get started (which is what we’re doing together in this post).
Let’s take a quick look at a summary of different programming/scripting options we have in Nuke, and what they’re good at:
| API | What it’s good at: | What it’s bad at: | Use it for: |
|---|---|---|---|
| Nuke Python API |
|
|
Pipeline integrations, customizing defaults, and automating repetitive tasks. |
| PySide2 (Qt for Python) |
|
|
Anything UI-related, advanced panels, etc… |
| Knob Expressions / TCL |
|
|
Calculating values for a knob from external factors, such as another knob. |
| Expression Nodes |
|
|
Simple image manipulation or generation nodes. |
| BlinkScript |
|
|
Most image processing nodes only dealing with RGBA and no Deep. The vast majority of Nuke’s built-in nodes could likely be rewritten in Blink. |
| NDK |
|
|
Any node that can’t easily be made from Blinkscript. That includes 3D and Deep nodes, but also nodes with complex behaviors, such as Tracker, Roto/Paint, Gridwarp, Shuffle, that you couldn’t possibly make with Blink. Also, use it for nodes that require a paid license. |
| OFX |
|
|
I’ll admit that I don’t know too much about OFX, I have never written a tool with it, so I am unaware of its best strengths or limitations. Definitely use OFX if you want to write a plugin that should also work on other hosts, like Resolve, Fusion, Natron, … |
As you can see, the NDK isn’t always the best solution, and since the introduction of Blinkscript, its usefulness has even been reduced further, but it still has a place to achieve certain functions that can’t be done with other solutions, or not easily/efficiently.
Side note: If you’re looking to learn Blinkscript, I was working on a course a while ago, but Chris Fryer beat me to it, so I put that on hold. Check out his course: https://www.chrisfryer.co.uk/product-page/an-artist-s-guide-to-blinkscript.
I haven’t watched it, but I’ve played with many of Chris’s tools and watched some of his videos and I’ve got no doubts about his ability to teach you what you need to get started with Blinkscript.
Compiling
One of the big drawbacks of the NDK is the need for compilation, or rather how complicated that compilation can be (especially compared to BlinkScript which also gets compiled, but is done by Nuke nearly automatically).
Compiling in C++ is the process of turning your human-readable source code, written in C++, into machine-readable instructions that a computer can understand and execute.
This compilation step acts as a gatekeeper, it’s the first hurdle you have to get through before you can really do anything with the NDK.
You could write some code first, but you can’t run any of it until you know how to compile.
Not only do you need to compile a different version of your plugin for every minor version of Nuke, but you also need to compile it separately for Windows, Linux, and Mac, as the machine code produced during compilation is specific for each platform.
A minor version of Nuke is when Nuke’s version after the dot changes, for example, Nuke 14.0 to Nuke 14.1 is a minor version change and would need to be re-compiled.
Major versions (Nuke 14.0 to Nuke 15.0) also need to re-compile, and in theory, could even require a re-write (I’ve not run into that yet, and some code written for Nuke 7 still seems to compile fine for Nuke 14).
The only time you do not need to recompile is for a new release version (patch version in semantic versioning), which is going from Nuke 14.0v5 to 14.0v6 for example.
Compiling is a bit complicated to set up the first time, but the good news is that once it’s set up, you don’t really ever have to worry about installing all the dependencies again, and it can become as easy as pressing a keyboard shortcut.
Finding the examples and instructions
When you install Nuke, it comes with a number of example plugins, which we’ll be using to set up our compilation. If we can compile these, we should be able to compile our own plugins too, so it’s a good way to get started before we have to write our own code. In your Nuke installation folder, you will see a Documentation folder. Inside that Documentation folder, there is a NDKExamples subfolder, which in turn contains examples, which contains a whole lot of example files. 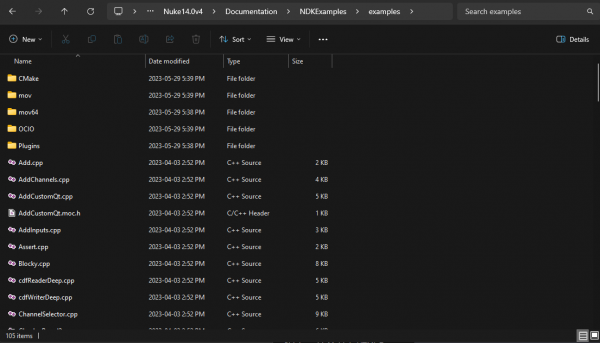
The source files containing the C++ code to compile are here, using a .cpp extension.
In certain cases, they may also contain a .h file, which would be the headers.
If you’ve read a little bit about C++, you should know that headers can define object signatures, without any implementation, and that the implementation can be done separately. You can think of this as a table of contents on the first page of a book. It tells you what the chapters are going to be, but not what they will contain. You can have your table of contents in your book, or keep it separated from the book itself (though not super practical with books).
It’s the same here, most .cpp file in that folder have their headers directly in it, but a few have them in a separate .h file.
Since Nuke 13, this examples folder also contains a README.md, which does help, even though I found some instructions not 100% accurate or complete (for a beginner).
Here are the contents of that file (The one shipped with Nuke 14.0v4). Don’t worry about it too much for now, I’m including it because I’ll be referring to it sometimes:
Nuke NDK Example Plugins
========================

Summary
-------

This directory contains the Nuke example plugin sources. The plugins are intended to be demonstrate how to use the NDK for developing Nuke plugins.

Requirements
------------

* CMake 3.10+
* Nuke installation
* GCC 6.3.1 toolchain on Linux
* Xcode 10.2 on MacOS
* Visual Studio 2017 on Windows

Build
-----

There is a build script provided along with the plugin sources to ease the process of development. It is using CMake which allows a cross-platform way for building these plugins. The NDK, residing in Nuke has a `NukeConfig.cmake` file which allows to use the standard CMake `find_package` process to pick up the NDK include directories and libraries to link against. It is providing a target called `Nuke::NDK` which then each plugin is using to link against.

### Configuration

```
$ cd Documentation/NDK/examples
$ mkdir build && cd build
$ cmake -DCMAKE_PREFIX_PATH="$NUKE_ROOT" ..
```

If you have an instance of OpenEXR 2.3.x, Qt 5.12.x, FFmpeg 4.2.x or OCIO 2.1.x in your standard search paths the script should find them. However, if they aren't in the standard search path, and you want to build the exr, mov64 or Qt specific plugins, you must add them into the `CMAKE_PREFIX_PATH` like so:

```
$ export MYQT=[QT_PATH]
$ export MYFFMPEG=[FFMPEG_PATH]
$ export MYEXR=[OPENEXR_PATH]
$ export MYOCIO=[OCIO_PATH]
$ cmake -DCMAKE_PREFIX_PATH="$MYQT;$MYEXR;$MYFFMPEG;$MYOCIO;$NUKE_ROOT" ..
```

### Building

It should be as simple as

```
$ cmake --build .
```

on Windows, you also must specify the configuration in case of using Visual Studio, which must be `Release` because we only provide these binaries with Nuke

```
cmake --build . --config Release
```

### Deployment

Now you can copy all the dll, so or dylib files into your `$HOME/.nuke` directory and Nuke will be able to load them. There is no standard installation or deployment steps configured in the build steps because it is highly dependent on the developer's workflow.
In the `Documentation` folder, you will also find an `NDKDevGuide` folder, which contains a local copy of the documentation available online at https://learn.foundry.com/nuke/developers/14.0/ndkdevguide/index.html
There is also an NDK reference under `Documentation\NDKExamples\Plugins`, which is also available online, though kind of hard to find (Foundry, if you read this, the link in https://www.thefoundry.co.uk/support/developers/ is broken): https://learn.foundry.com/nuke/developers/141/ndkreference/Plugins/index.html
I’ll probably be referring back to these pages in other articles once we start making our own plugins, and you may notice I’m not always using the docs for the right version of Nuke, that’s because I google a lot of stuff, and Google doesn’t always point me at the latest Nuke’s docs (nor am I using the latest anyways).
Compiling for Windows
There are different ways to compile for Windows, and I’ll be showing 2 different ways here: Using CMake (as recommended by Foundry’s README), and using Visual Studio directly.
1 – Install dependencies
The first thing we need to do is to install our dependencies.
As noted in the README, that is: Nuke itself, CMAKE (optional if only compiling from Visual Studio), and the correct version of Visual Studio for your version of Nuke.
I’ll assume that you already have Nuke installed, and we can install CMAKE at the same time as we install Visual Studio (which I will sometimes abbreviate to “VS”).
You may notice that the version of VS required for your Nuke version is often older than the latest version of VS distributed by Microsoft.
Also, Microsoft only gives access to recent versions of Visual Studio Community for free.
If you need older versions of the whole IDE, that’s only accessible for paying customers.
This is not actually a problem, because we don’t need the full IDE!
What we really need is the build tools for the correct version.
For the IDE, we can use the latest and greatest of the community edition (free) or use a different IDE altogether.
You could write the whole thing in Notepad if you like.
I’m going to be using Visual Studio Community 2022 as my IDE.
You can download it here: https://visualstudio.microsoft.com/vs/community/
As I mentioned above, the critical part is the build tool, which needs to be using the correct version, so this is what I will show in detail.
Each Nuke version requires specific Build tools:
| Nuke Version | Visual Studio Version |
|---|---|
| 12 | Visual Studio 2015 Update 3 – (Manifest Version: 14.0.24210) |
| 13 | Visual Studio 2017 |
| 14 | Visual Studio 2019 |
| 15 | Visual Studio 2019 |
As of the date of writing this article, you can find the build tools for these versions at https://visualstudio.microsoft.com/vs/older-downloads/, although the build tools for 2015 are now only available as a ROM, and need to be either burned to a DVD or mounted via some software solution.
I’d recommend skipping Nuke 12 or older at this point unless you really need to support it.
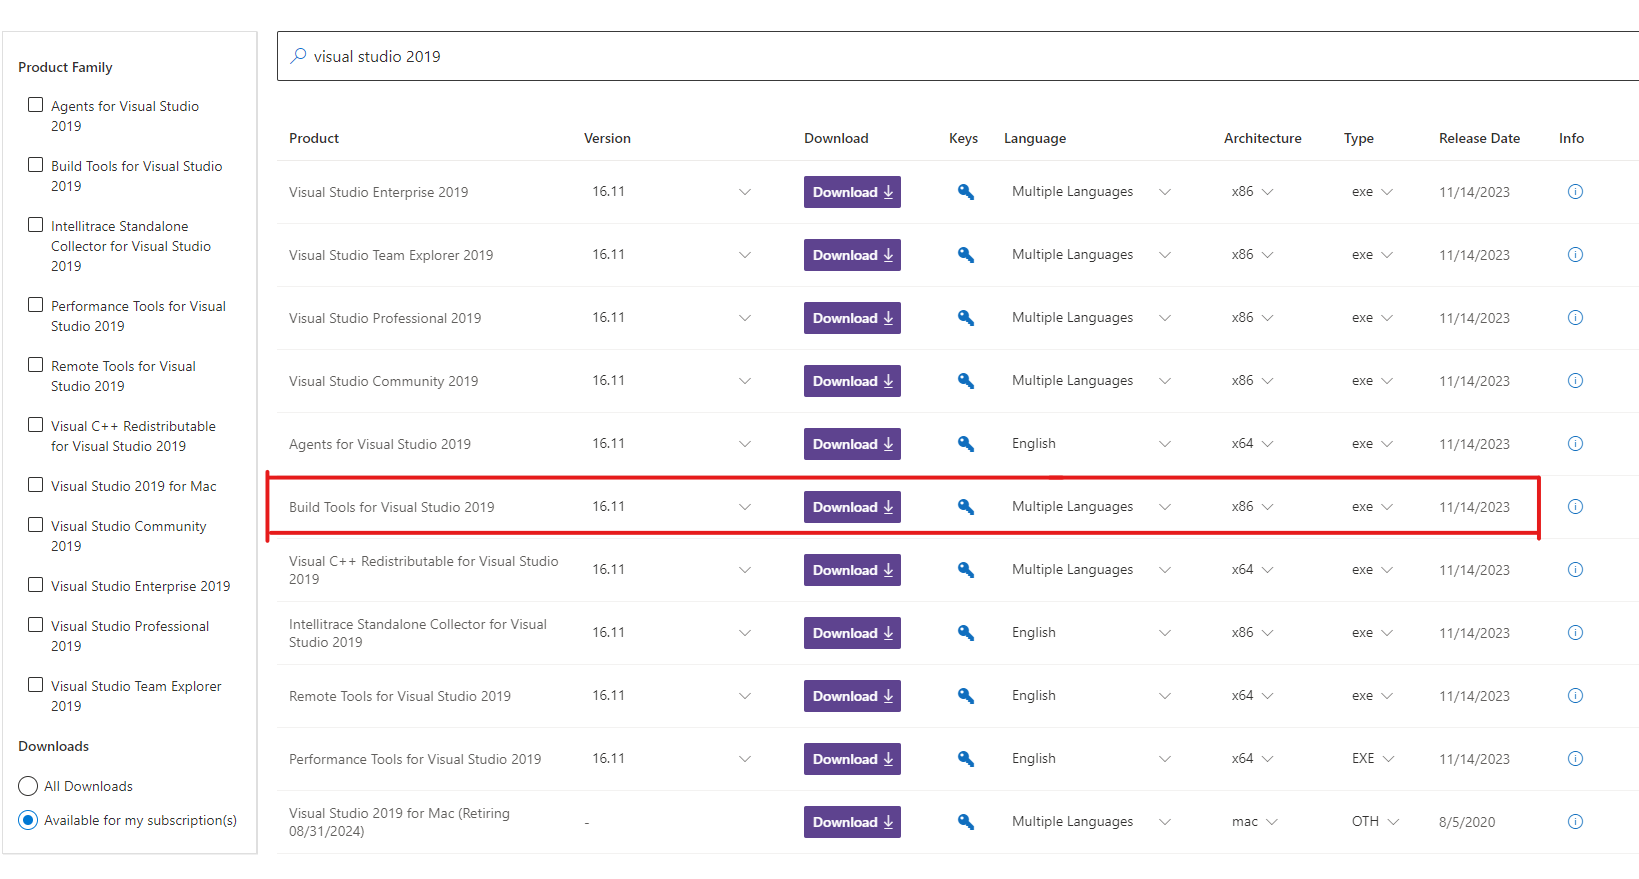
Select the build tools for the correct VS version.
Once the exe has downloaded, run it.
You will be greeted by this window: 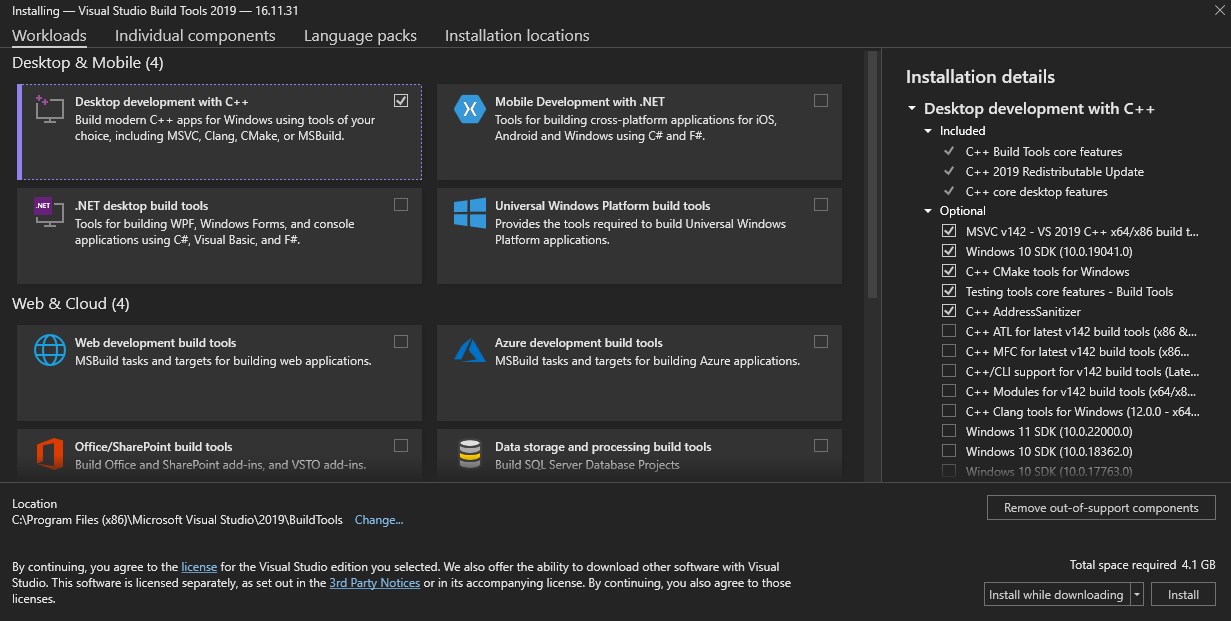 Select “Desktop development with C++”. The tab on the right will show some extra optional components you can install.
The defaults should be good, and include CMAKE (remember it was one of our dependencies), though you could skip it if you do not want to use CMAKE.
I’m not sure about every optional package, but DO NOT REMOVE the recommended Windows SDK.
I made the mistake myself thinking that I could skip it because I had already installed it for different versions of VS, and I was unable to compile and went down a deep rabbit hole until I figured out why I couldn’t compile.
Click “Install”, and let the installer do its things.
2 – Build with Cmake
CMake is a tool used in software development to manage the build process of a project.
It generates platform-specific build files (like Makefiles or Visual Studio project files) based on a high-level description of the project’s structure and dependencies.
CMake has its own scripting language for writing configuration files, which makes it a whole other beast to learn about.
The good news is we don’t really have to understand the intricacies of CMake to use it here, though I’m sure many things could get customized if we did.
The CMake process is controlled by a file that lives in our examples folder, called CMakeLists.txt. The first few lines of the file look like this:
cmake_minimum_required(VERSION 3.10 FATAL_ERROR)
project(NDKExamplePlugins)

set(CMAKE_MODULE_PATH "CMake;${CMAKE_MODULE_PATH}")
set(CMAKE_POSITION_INDEPENDENT_CODE TRUE)

find_package(Nuke REQUIRED)

function(add_example_plugin PLUGIN_NAME)
    add_nuke_plugin(${PLUGIN_NAME} ${ARGN})
    target_compile_definitions(${PLUGIN_NAME} PRIVATE FN_EXAMPLE_PLUGIN)
endfunction()

add_example_plugin(Add Add.cpp)
add_example_plugin(AddChannels AddChannels.cpp)
add_example_plugin(AddInputs AddInputs.cpp)
add_example_plugin(Assert Assert.cpp)
add_example_plugin(Blocky Blocky.cpp)
...
Even though we don’t need to become experts at CMake, let’s break it down:
cmake_minimum_required(VERSION 3.10 FATAL_ERROR): Specifies the minimum version of CMake required to build the project, and it will generate an error if the version is below 3.10.project(NDKExamplePlugins): Sets up the project with the name “NDKExamplePlugins.”set(CMAKE_MODULE_PATH "CMake;${CMAKE_MODULE_PATH}"): Appends a path to the CMake module path. Modules are used to extend CMake’s functionality.set(CMAKE_POSITION_INDEPENDENT_CODE TRUE): Sets the position-independent code flag, which is often necessary for creating shared libraries.find_package(Nuke REQUIRED): Searches for the Nuke package, ensuring it is installed. This command typically locates and sets up necessary variables and paths for using Nuke in the project.function(add_example_plugin PLUGIN_NAME) ... endfunction(): Defines a CMake function namedadd_example_plugin.add_nuke_plugin(${PLUGIN_NAME} ${ARGN}): Calls another CMake function, which is defined in `C:\Program Files\Nuke14.0v4\cmake\NukeConfig.cmake`, to add a Nuke plugin with the given name and source files to the project.target_compile_definitions(${PLUGIN_NAME} PRIVATE FN_EXAMPLE_PLUGIN): Adds a compile definition (FN_EXAMPLE_PLUGIN) to the target, which can be used to conditionally compile parts of the code based on this definition.
add_example_plugin(Add Add.cpp),add_example_plugin(AddChannels AddChannels.cpp), and so on: Calls the customadd_example_pluginfunction for each plugin, specifying the plugin name and its corresponding source file(s).
At this point, we could go ahead and run CMake, but everything is in the Nuke Install folder, and I don’t like modifying files in the install folder, so I’m adding one step: Copy the whole examples folder to another location first.
We’re now reaching the “Configure” step from Foundry’s README.
In your copy of the examples folder, make a new folder named build. 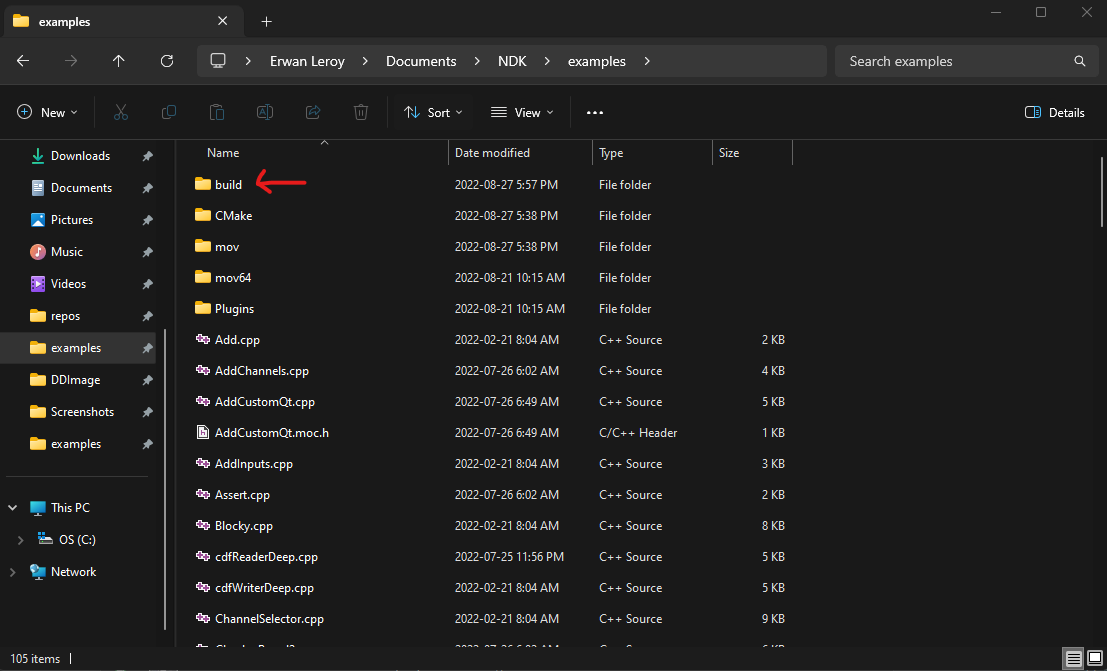
We’re now ready to start typing the commands provided by the README, however, where should we be typing them?
While you could attempt it in Powershell or CMD.exe, there would be a lot of configuration required to set up all the environment variables required for it to work.
Instead, you can use our newly installed VS build tools.
For Nuke 14/15, launch the software called “x64 Native Tools Command Prompt for VS 2019”.
For 13, launch “x64 Native Tools Command Prompt for VS 2017”.
For 12, launch “Visual C++ 2015 x64 Native Build Tools Command Prompt”.
As we made the build folder already, we can skip that step in the README:
cd path/to/my/examples/build
cmake -DCMAKE_PREFIX_PATH="C:\Program Files\Nuke14.0v4" -A x64 ..
Note that the ‘..’ at the end of the command is part of it, and not meaning I left stuff out of the command.
For Nuke 13 the command is similar, but needs to point at the install path of Nuke 13.
For Nuke 12, the command is slightly different: cmake -DCMAKE_PREFIX_PATH="C:\Program Files\Nuke12.2v11" -G "Visual Studio 14 2015 Win64" ..
Running this generates files in our `build` folder, though these aren’t our compiled files yet, they’re different configuration files generated by CMake.
Running the compilation is pretty straightforward, and as documented by Foundry:
cmake --build . --config Release
This will go ahead and compile all the plugins listed in the example’s CMakeLists.txt.
There may be a whole lot of warnings while building, but as long as it’s not an error that’s fine.
VS will generate all the plugins as .dll files, in this folder examples\build\Release.
To run these in Nuke, you can copy them to your .nuke folder or put them in any other folder part of your Nuke Plugin Path. You can create the node by pressing X and typing the name of the class, or with Python as you’d normally make a new node in Python.
We’ll talk a little bit more about adding them to Nuke in the next section, which is compiling from VS IDE directly, and in the python section at the end of this article (after the Linux and Mac sections).
Later on, when want to compile our own plugins, all we really need to do is put a simple CMakeLists.txt in our custom project’s folder, and run the steps above.
Your own project structure would look like this:
MyPlugin/
    build/
    CMakeLists.txt
    MyPlugin.cpp
    MyPlugin.h (optional)
Your own `CMakeLists.txt` would likely be as simple as:
cmake_minimum_required(VERSION 3.10 FATAL_ERROR)
project(MyPlugin)

set(CMAKE_MODULE_PATH "CMake;${CMAKE_MODULE_PATH}")
set(CMAKE_POSITION_INDEPENDENT_CODE TRUE)

find_package(Nuke REQUIRED)

add_nuke_plugin(MyPlugin MyPlugin.cpp)
3 – Building from Visual Studio IDE
The technique above to compile with CMake is pretty good for compiling a large number of plugins, for a single version of Nuke.
I’m sure with some knowledge of CMake scripting and/or batch files there are ways to make it compile for multiple versions of Nuke at once.
However, if you’re like me, you will most likely end up with only a few Plugins to compile, and only really compile them when making a change to them or wanting to try them for a new Nuke version.
I have found that compiling directly from the IDE is a lot easier than via CMake while I’m developing a Plugin, as VS lets me build by simply pressing Ctrl+B.
For this, we will not be compiling all the examples, we’ll just pick one to compile.
I’ll use Add.cpp here but you can use whichever one you want. First thing first, we need to set up our first VS project and solution (A Visual Studio solution is a container that organizes and manages one or more related projects, providing a centralized workspace for developing, building, and debugging applications).
Let’s click “New Project”, and fill out the information as below: 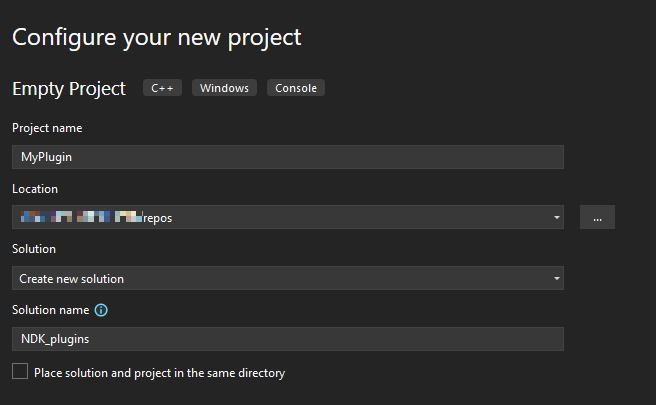
Let’s also copy Add.cpp into our Source Files: 
I originally set up my project in VS by following this blog post from Max van Leeuwen, with a few changes and updates due to the newer versions of VS and Nuke.
Start by opening your project properties under Project > {project_name} Properties. 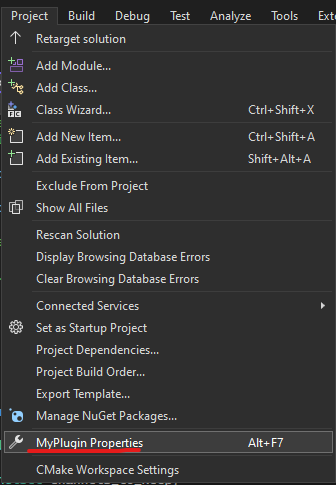
What I like to start with, is renaming the default config from “Release” to “Release {nuke_version}”.
Here, I’ll start with configuring the Project to compile for Nuke 13.2, so I’ll click “Configuration Manager” on the top right of the panel. 
The Panel that opens now will contain every project in your solution. 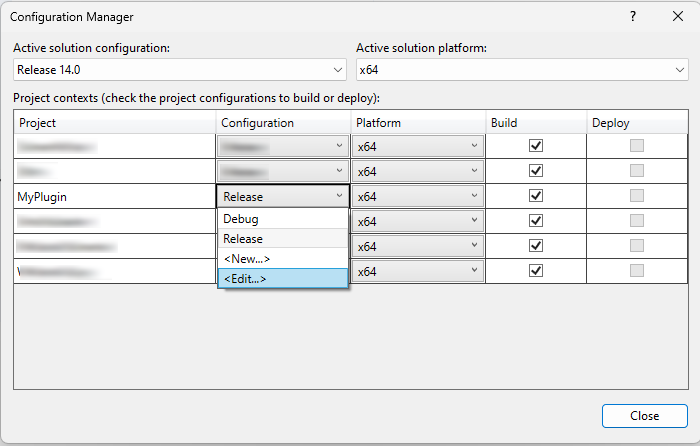 Most likely yours will only have a single project at first.
In the “Configuration” column, click the dropdown, select “Edit”, then rename “Release” to “Release 13.2”.
Once this is done, you can close the Configuration Manager panel, until you’re back to the “MyPlugin Property Pages”.
Since this has a lot of pages, and we only care about a few of the settings, I will borrow from Max’s technique and only list the relevant settings here.
- General > Target Extension: Change to .dll
- General > Platform Toolset: Change to the correct version of Visual Studio for your target Nuke Version. Here I’m configuring 13.2, so I’ll pick “Visual Studio 2017”. This is the key part that allows us to dev in VS 2022 but compile properly for older VS versions.
- General > Character Set: I had to change this to “Not Set” in order to get VS to compile properly.
- C/C++ > General > Additional Include Directories: Set to “
C:\Program Files\Nuke13.2v3\include;%(AdditionalIncludeDirectories)“ - C/C++ > General > SDL checks: No
- Linker > General > Additional Library Directories:
C:\Program Files\Nuke13.2v3;%(AdditionalLibraryDirectories) - Linker > Input > Additional Dependencies: Click “Edit”, and add these to the default ones: “
opengl32.lib;DDImage.lib;RIPFramework.lib;glew32.lib;tbb.lib;tbbmalloc.lib“ - Build Events > Post-Build Event: I set this value to:
mkdir "$(USERPROFILE)\.nuke\13.2\" 2>nul & copy /Y "$(OutDir)$(TargetName)$(TargetExt)" "$(USERPROFILE)\.nuke\13.2\$(TargetName)$(TargetExt)"I feel like this one deserves a bit of an explanation.
First, it tries to make a directory. “$(USERPROFILE)\.nuke” is your .nuke folder.
In there, I make a subfolder corresponding to my Nuke version.
The2>nulpart suppresses the error message if the directory already exists.
Then, the&operator is used to execute thecopycommand regardless of whether the directory creation was successful or not.
The copy command takes our newly compiled.dlland copies it into our.nuke/13.2folder.
Max had this opening Nuke automatically, but I don’t. Feel free to customize it as you like.
For every other setting, I leave the default value. If I need to compile for other versions, I can go back to the Configuration Manager, and create a new configuration.
When you do this, it allows you to pick another configuration to use as a starting point: 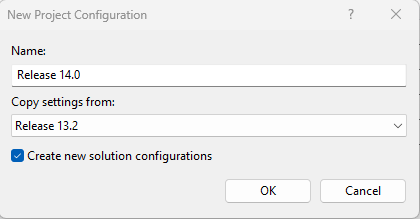 All that needs to change is the correct version of VS in General > Platform Toolset, and any path that points at a specific Nuke version that we configured above.
Now, you should be able to Go to Build > Build MyPlugin, which will compile your plugin and place it in your Nuke folder.
While the compilation should work, you may not be able to load it in Nuke yet, because we made MyPlugin.dll, but we used the code from Add.cpp and created a node named Add.
Let’s open Add.cpp and rename it to MyPlugin.cpp, and also do a search and replace in the source code, and replace every instance of Add with MyPlugin, then Build again.
We can now create “MyPlugin” Node in Nuke, which does exactly the same as an “Add” Node. 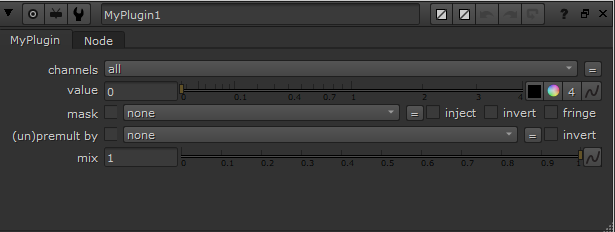
Compiling for Linux
This section of the article was written by Simon Jokuschies, from https://www.cragl.com/ with very minor edits from myself to tie in with the rest of the post.
Compiling with GCC
Foundry advises to compile nodes using the GCC compiler. The exact GCC version to use depends on the Nuke version to compile for. Please refer to the required GCC version as stated in the documentation: https://learn.foundry.com/nuke/developers/14.0/ndkdevguide/appendixa/linux.html You can change the ‘14.0’ in the above URL to navigate directly to the exact Nuke NDK documentation of your preferred Nuke version. Note that the 14.0 documentation states:
NUKE is built on a Centos 7.4 Linux 64-bit machine, using GCC 9.3.1 Plug-ins compiled with GCC versions 9.3 through 9.5 should be compatible
To find out the GCC version installed on your machine execute the following in your terminal: gcc --version 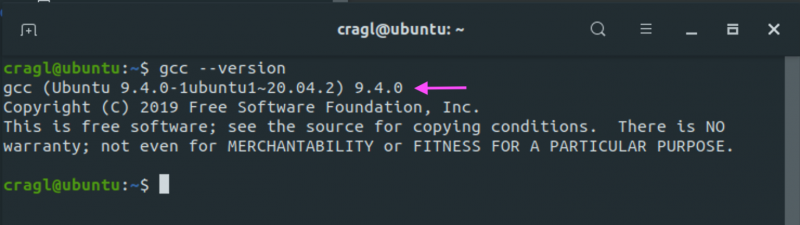
If GCC is not already installed, the installation procedure may vary depending on your Linux distribution, so please Google the instructions on how to install GCC.
To compile a node, cd into the folder that contains your .cpp file, then execute the following: gcc -shared -fPIC -I <path/to/NukeXX.XvX/include> -std=<c++XX> -o NameOfPlugin.so NameOfPlugin.cpp
Some explanations on this command:
gccis the executable to call which will compile our node.- Using
-sharedwill produce a shared object which can then be linked with other objects to form an executable (or a node). This is needed for Nuke nodes. You must also specify the same set of options that were used to generate code (-fpic,-fPIC, or model suboptions) when you specify this option. - The
-Iflag: This option specifies directories to search for header files. Nuke nodes require certain functionality ofDDImage(DD-> DigitalDomain: where Nuke originally was invented) wherepath/to/NukeXX.XvX/includeis the absolute path of the ‘include’ folder of your Nuke installation. This folder contains several header files required to compile nodes. Update the path as needed to state your Nuke version to compile for. -std=<c++XX>is the language standard to compile for. The Nuke documentation (above-stated URL) states for Nuke-14.0: “Please use the ‘-std=c++17’ compiler switch.” Set the value to the std standard stated in the documentation for the Nuke version you want to compile for.- The
-oargument specifies the file name to write to. Under Linux, we need a.sofile. - Finally, `NameOfPlugin.cpp` is the .cpp you wish to compile. Change that value to the name of your .cpp file.
For additional information on GCC please refer to: https://gcc.gnu.org/onlinedocs/gcc-3.1.1/gcc/Invoking-GCC.html An overview of all flags offered can be found here: https://gcc.gnu.org/onlinedocs/gcc-3.1.1/gcc/Option-Summary.html#Option%20Summary
Concrete example of compiling with GCC
Here is a concrete example for compiling a custom node called ‘VenetianBlinds’ under Nuke-14.0.
gcc -shared -fPIC -I /home/cragl/Nuke14.0v1/include -std=c++17 -D_GLIBCXX_USE_CXX11_ABI=0 -o VenetianBlinds.so VenetianBlinds.cpp

Note: the `-D_GLIBCXX_USE_CXX11_ABI=0` flag is a special case for Nuke-14.1 and Nuke-15, as stated here: https://learn.foundry.com/nuke/developers/14.1/ndkdevguide/appendixa/linux.html#abi-issues Although not mentioned in that link, this seems to also be required for Nuke-14.0 Executing this command will create the `.so` file which is your compiled node: 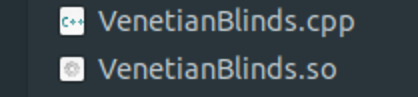
After adding this node to your path (same instructions as Windows, or scroll down to the Python section below), you should be able to create the node in Nuke. 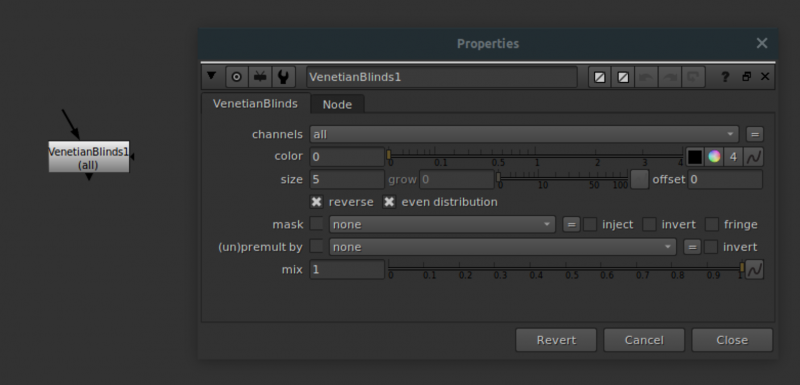
Note about Linux Distributions
Linux offers many different variants, called distributions.
Nuke is not supported by all of them. Foundry used to support CentOS as the official distribution but recently changed to Rocky Linux.
There is some good information about Linux distros on https://vfxplatform.com/linux/ for those interested in digging deeper.
That does not mean that Nuke will only run under that distribution.
While Nuke is supported under Rocky Linux, it runs under many distributions like Centos, RHEL, Ubuntu, Mint, and Fedora as well.
Sometimes there are however some complications involved depending on the given distribution.
That is something you will need to test out.
Many users new to Linux might start with Ubuntu as it is quite user-friendly and has a large community. I (Simon) have been using Nuke under Ubuntu for many years without issues. (Erwan note: I’ve also used it at studios on CentOS and Kubuntu without issues. Kubuntu is the KDE variant of Ubuntu, which itself is using Gnome… KDE and GNOME are desktop environments for Linux, providing graphical user interfaces and a set of default applications. That’s a whole debate I won’t get into today.)
Automated compiling against multiple Nuke versions
Executing the above-mentioned command for each and every minor version can become tedious. You can automate that using a batch file. Below is an example of how to do this. Save this to a file and update the ‘PLUGIN_NAME’ and ‘include’ directory paths accordingly:
This compiles one stated variant after another and moves the compiled nodes to a versioned folder: 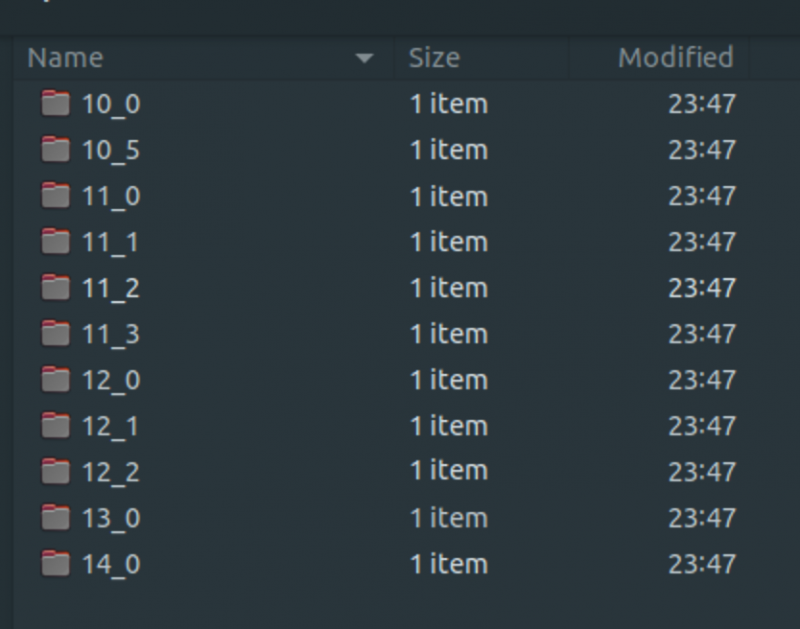
The needed variant can then be loaded automatically via python
Compiling for Mac
OSX Documentation: https://learn.foundry.com/nuke/developers/14.1/ndkdevguide/appendixa/osx.html
Everything in the Mac section after this line was written by Luis Afonso Mota, thanks a lot, Luis!
To start with, it’s important to note that I’m using a M1 Pro Macbook Pro running MacOS Sonoma 14.1.1 . Things might change if you’re using a different (especially older) version of MacOS. I’m also using Nuke 15.0v1
Requirements
Terminal:
Your terminal is already installed but if you’ve never used it’s a very similar shell to the linux terminal. You can find it by pressing CMD + Space (⌘ + Space). It’s also in your `/Applications/Utilities/Terminal.app`
Xcode:
Xcode is Apple’s own development tool. It is generally valuable to have when coding anything as it connects everything to the right place in your OS. I recommend downloading the latest from the App Store and selecting the packages to develop for macOS: 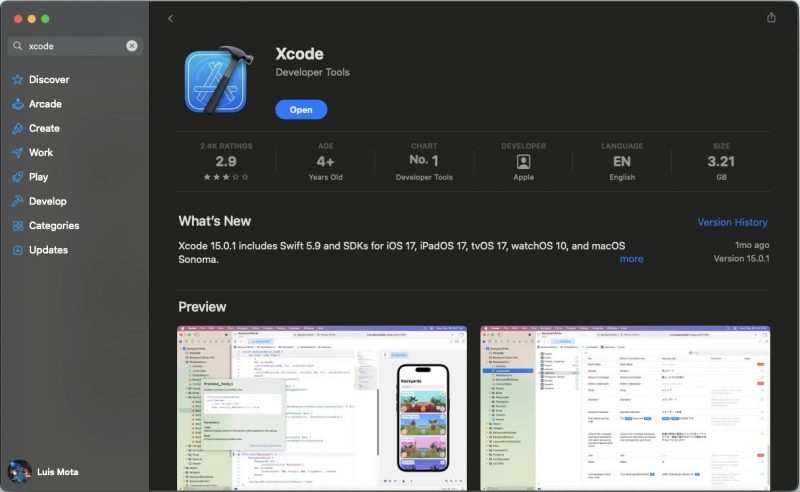 After installing open up a terminal window and type:
 Xcode-select —install
This should install all the Xcode command line tools if they didn’t automatically.
Homebrew:
Although not a main requirement I highly recommend installing homebrew (https://brew.sh/) as it will really make things simpler for you. Homebrew is a package manager that is incredibly useful when installing anything to do with coding. From my experience, it automatically sets up everything to be used from the terminal. I’ll mention where this comes into effect throughout.
Cmake:
If you’ve installed Homebrew the easiest way to install Cmake is to use type: brew install cmake In a terminal window. (https://formulae.brew.sh/formula/cmake)
You can also install Cmake with a GUI from the original website but you’ll have to add it to your `$PATH` or `.bashrc` I personally found this to be a bit finicky and homebrew to be a more foolproof way.
Check your install of Cmake in a terminal by typing: cmake –version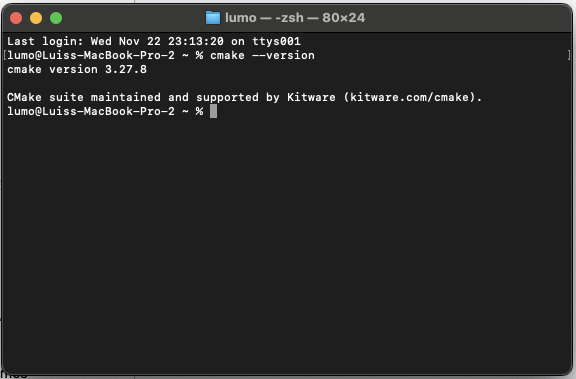 Foundry’s README.md file says that it requires 3.10+ so anything above that should be fine.
Setting Up
The easiest way to make sure everything is going correctly is to try and build Nuke’s example folder.
You can find the original example folder in /Applications/Nuke{version_number}/Documentation/NDKExamples/examples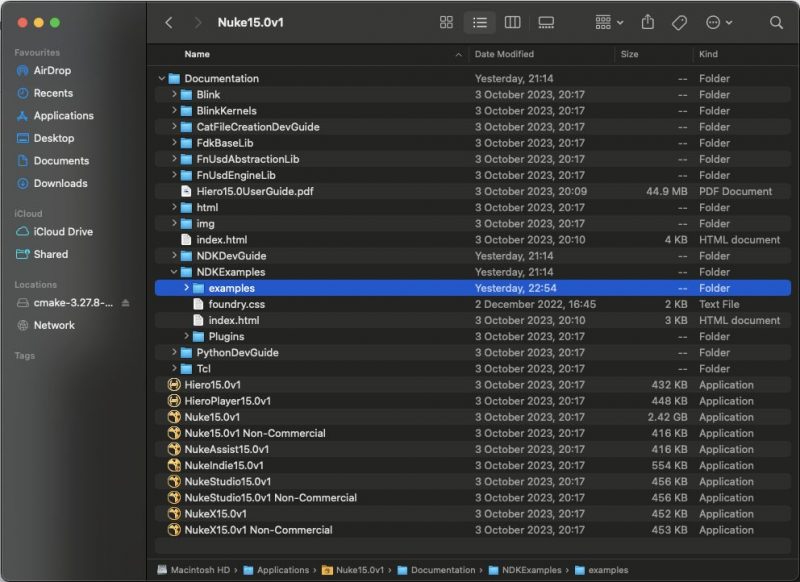 As recommended I’ve made a copy of this folder so as not to mess with the original nuke install folder. I dropped this copy in my documents folder but feel free to drop it where it is the most convenient.
Building
Now that all the setup is done we can start creating our build directories.
In a Terminal, navigate to your example folder.
Mine is /Users/lumo/Documents/Projects/Current/Nuke_NDK/examples
The easiest way to do this is by right-clicking your folder and holding the option key (⌥).
A “Copy “{folder name}” as Pathname” should show up and you can click that. 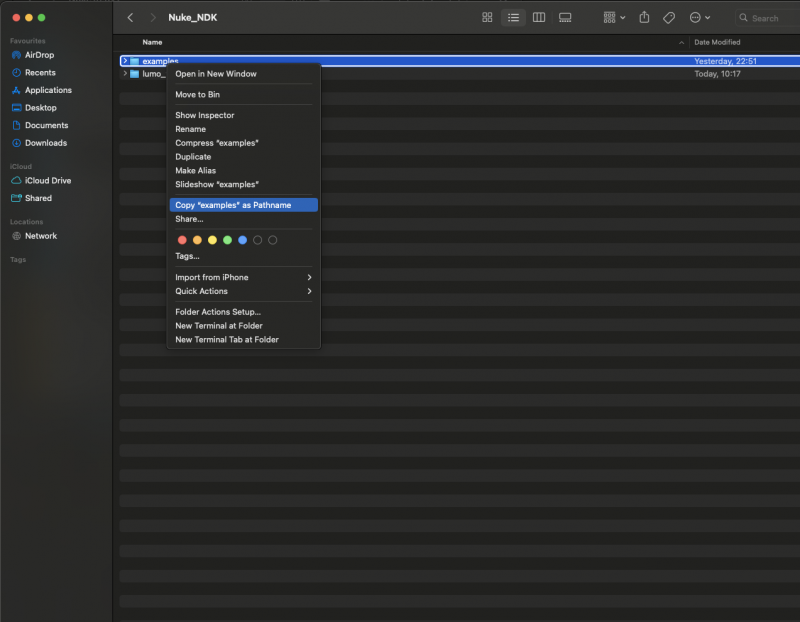
In a terminal type: cd /{your path}
You can do cmd + v to paste your path.
As an example, mine was cd /Users/lumo/Documents/Projects/Current/Nuke_NDK/examples
If this errors out for some reason check that you’ve added a forward slash “/” before your path.
Mac usually doesn’t copy that first slash.
We’re now in the correct folder so we can create our build folder.
Do this by typing mkdir build Followed by cd build
It should look something like this: 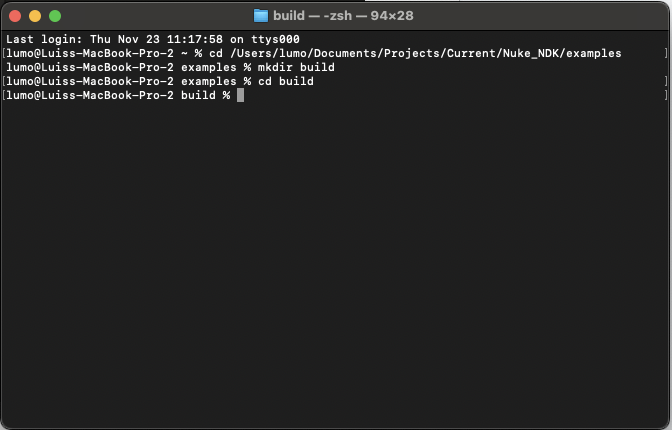
Finally, we’re ready for the fun CMake stuff.
The first thing to do is set the prefix path.
The readme folder says for this to be your Nuke install root but I found that that didn’t work.
Right-click on your Nuke application followed by “Show Package Contents” 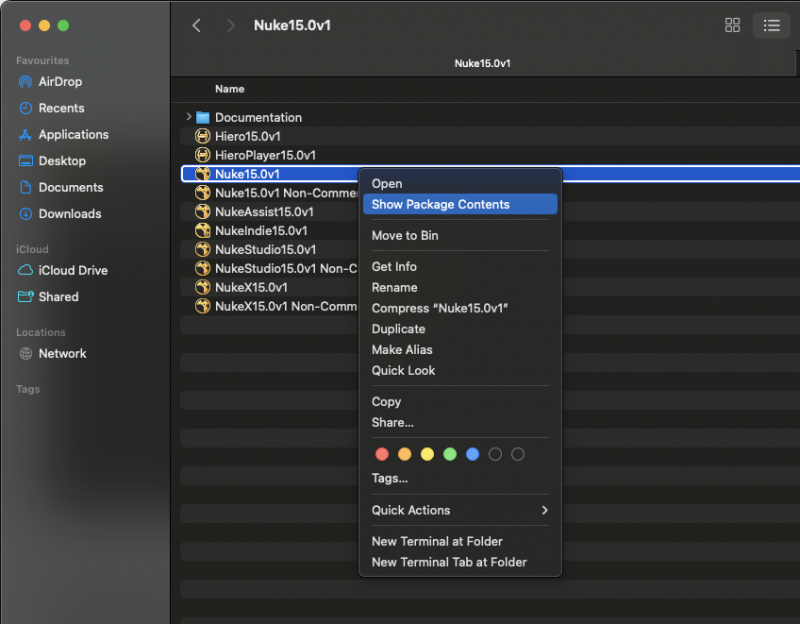
Inside Contents you’ll find your MacOS folder. That folder contains all the Cmake dependencies for building.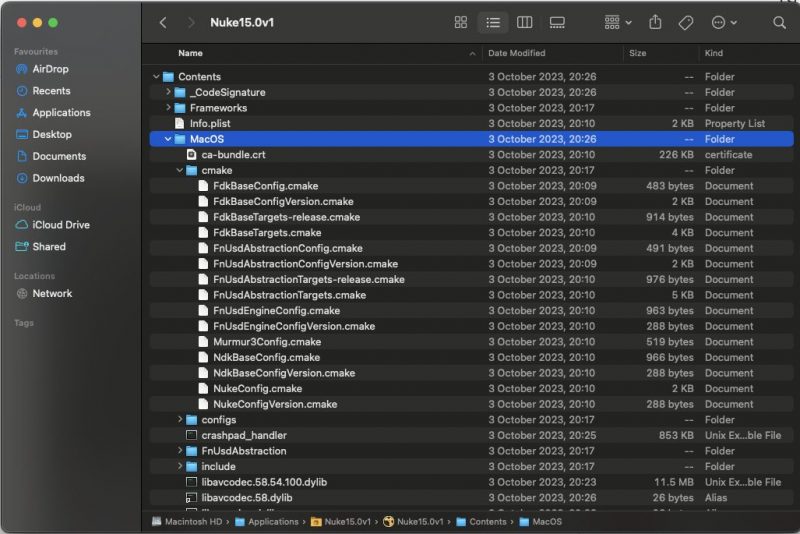
Back to the terminal, your command should look something like: cmake -DCMAKE_PREFIX_PATH="/Applications/Nuke15.0v1/Nuke15.0v1.app/Contents/MacOS" ..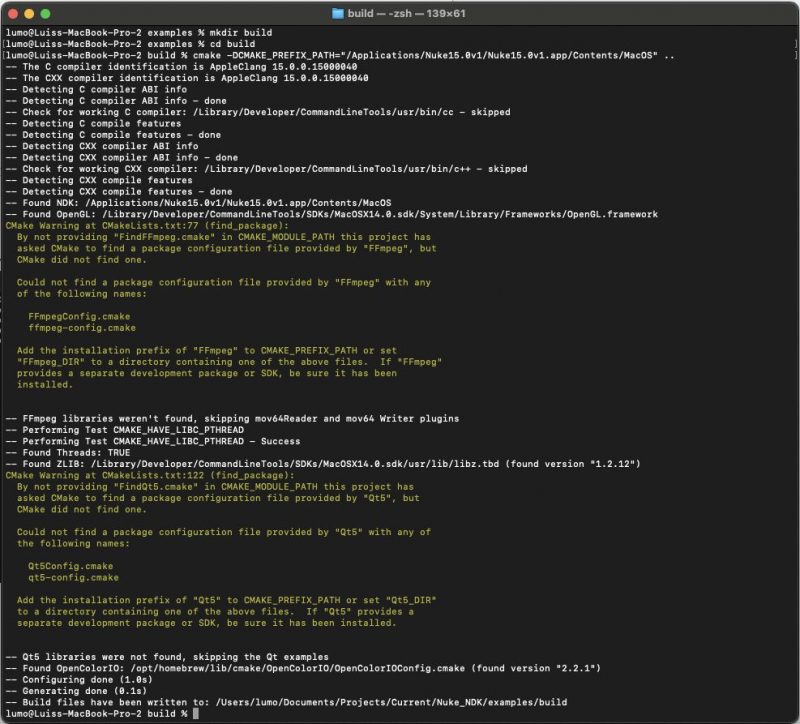
There are a couple of warnings for missing packages.
You can define them as described in the README.md file but I’m ignoring them since I don’t really need them at the moment. Some of these can also be installed with Homebrew.
All we really need to do now is build!
In your terminal type: cmake --build .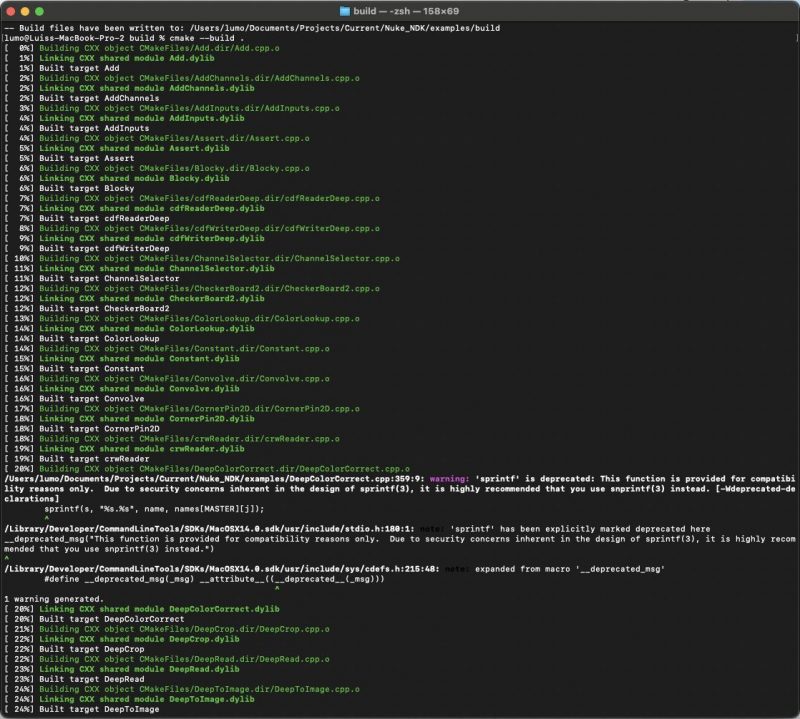
All your build (.dylib) files should now be in the new build directory we created.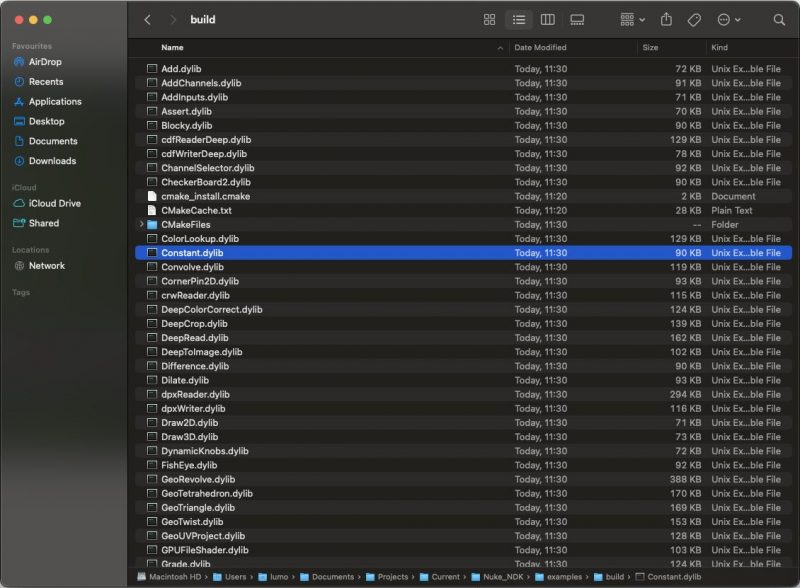
My own custom nodes
To build my own nodes, what I’ve done is I have replicated the process in a new folder and copied the CMakeLists.txt from the original Nuke install directory and modified it to add my own test plugin. 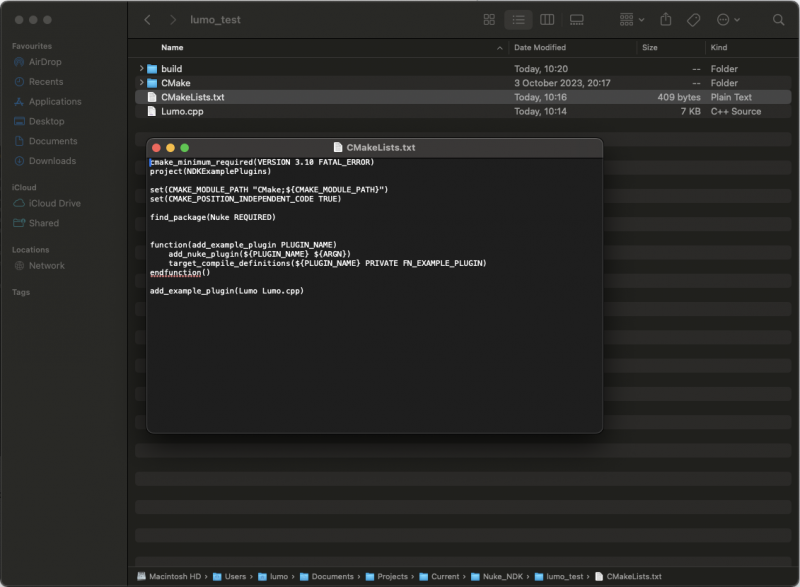
(Note from Erwan: You do not need to define `add_example_plugin` here, all it does is calling `add_nuke_plugin` and setting a variable for compiling the example plugins differently. Since we’re most likely not using that example variable in our own custom plugins, we can directly call `add_nuke_plugin`.)
Once done you can just copy the .dylib files into your `.nuke` folder and call them into nuke by pressing “x” and typing the names or any other python ways to bring your nodes in.
(Erwan note: Since the plugins are only for a single version of Nuke, but your `.nuke` folder is likely shared across versions, I’d recommend putting them in a sub-folder instead, named `{MAJOR}.{MINOR}`, and continue to the next section for instructions on how to have them automatically picked up by Nuke.)
Bonus: Cross-platform compilation using Docker and CI/CD
Gilles Vink wrote a blog post about automating compilation via CI/CD and docker containers. It requires a tiny bit more knowledge but it’s really cool, and I’ll be looking into ways to adopt it myself, have a look here: https://gillesvink.com/the-easiest-and-quickest-way-of-developing-and-compiling-nuke-plugins/
A little bit of Python, for any OS:
In your init.py, you can add:
nuke.pluginAddPath("{}.{}".format(nuke.NUKE_VERSION_MAJOR, nuke.NUKE_VERSION_MINOR))
This will add the folder corresponding to your nuke version (as we set up in the Windows/VS section) to your plugin path, making your .dll files available for Nuke. Note that if you’re following Simon’s Linux guide, he used MAJOR_MINOR instead of MAJOR.MINOR like I did, and you’d need to adjust the code accordingly below. You can also add a few lines to your menu.py to automatically make a menu entry for all your installed plugins:
import nuke
import os
import glob

plugins_menu = nuke.menu('Nodes').addMenu("My Plugins")

dll_pattern = os.path.join(
    os.path.dirname(__file__),
    "{}.{}".format(nuke.NUKE_VERSION_MAJOR, nuke.NUKE_VERSION_MINOR),
    "*.dll"
)
for dll_file in glob.glob(dll_pattern):
    plugin_name = os.path.splitext(os.path.basename(dll_file))[0]
    plugins_menu.addCommand(plugin_name, "nuke.createNode('{}')".format(plugin_name))
You should now be all set up to get started making your first plugin, which we’ll cover in Part 2, whenever I get a chance to get to it.
Thank for sharing. I am lighting/comp td and your content help me a lot 🙂
Thank you so much for sharing such invaluable information. It’s truly a ‘keeper’ – something I’d frame and cherish. I’m deeply grateful for your help and generosity!
Hi Erwan – thanks so much for providing this! I’m starting to dive into C++ and would probably be a bit lost with the configuration
One thing I ran into (using MSVC2022, with build setting of MSVC2019 , Nuke 15, Windows):
#error directive: NOMINMAX must be added as a compile definition!
#error: _USE_MATH_DEFINES must be added as a compile definition!
I managed to successfully compile by adding `-DNOMINMAX` to C++ > Command Line. I then added `#define _USE_MATH_DEFINES` to the top of the .cpp file.
Not sure if there is a more proper way to handle these.
I’ve not seen these before, so I’m not too sure. I’m no compiling expert, I usually do some trial and error until I find something that works. You could try posting on the Nuke forum Dev section, there are a couple of users there who have a lot more experience than I do with compilation.
Hi Mike.
I ran into the same problem, and sorted it by adding these entries:
Amazing documentation Erwan! Thanks a lot for putting it together.
I’d like to add that, if you are using a nuke version under 15.0 and compiling for MacOS with a mac that uses Apple silicon (M series), by default Xcode will use arm64 architecture, so in order to make it work you have to add this line in the CMakeLists.txt file:
set(CMAKE_OSX_ARCHITECTURES “x86_64”)
So the compiled files are able to be used under Rosetta emulation.
I’ve tested it and it works, but some of the examples fail to compile, like the exrReader.cpp (there might be some inconsistencies on versioning and deprecated methods) too many errors raised..
Here you can find more info:
https://www.foundry.com/products/nuke-family/requirements
I hope this helps
Thanks for the extra info! I don’t use OSX myself but hopefully would be useful to someone landing here.