
After 7 years away, I am moving back to Vancouver. This was the decision my wife and I made, after much deliberation and pros-and-cons lists. While the few people over there who I’ve stayed in touch with frequently knew about it, the vast majority of my past colleagues did not, and as the date was fast approaching, I thought I’d post on LinkedIn so that I could start rekindling these connections. As these posts are always more fun with a picture (do text-only posts even show up in the feed anymore?) I started thinking about a Vancouver-related picture I could post.
I might have some photos I took back in the days, but they’re somewhere on a hard drive in storage, and I’m not even sure I have anything relevant.
Maybe draw the skyline with nuke nodes in the DAG? Maybe the skyline is not distinctive to the point where it would be recognizable with such constraints.
I then remembered Digital Orca, the pixelated sculpture by Douglas Coupland near the convention center. It’s recognizable, evokes Vancouver for the people who live there, and its pixellated nature lends itself nicely to a digital representation.
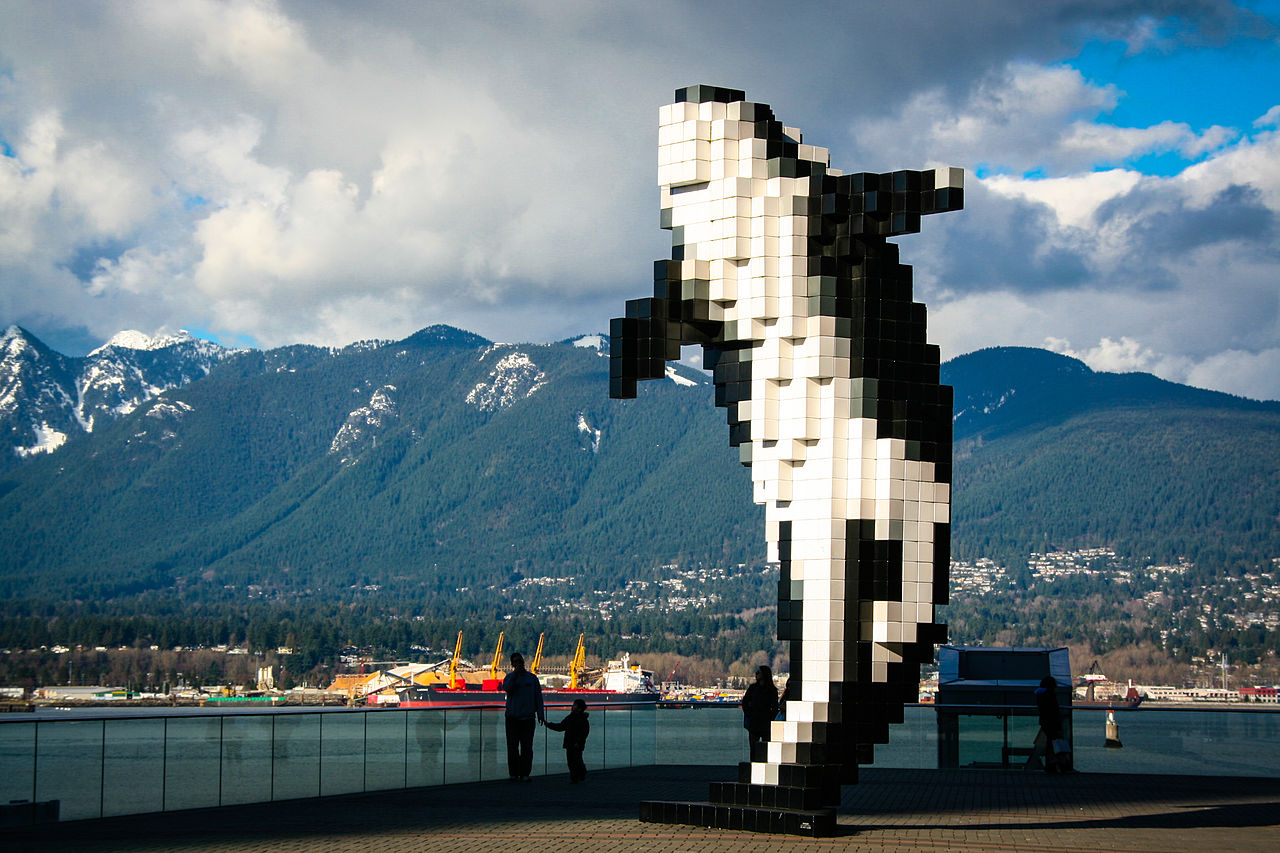
Digital Orca by Douglas Coupland – Photo by Philip Jama (From Wikipedia)
A DAG picture of it would work, but a 3D representation would be more suited to the original art, so I decided to recreate it in the 3D viewport. I wouldn’t need to render it as I wanted the picture to be recognizable as Nuke.
I knew right away I didn’t want to place cubes one by one, so I devised what I thought would be a smart solution:
I could write a mini python script that would create the cubes for me, and I could feed this script a string of characters to control which cube to create:
0 for no cube
1 for black cube
2 for grey cube
3 for white cube
I would then simply need to count the number of cubes for each row/column/depth and write a string such as “00001112211322000….”
Looking at the sculpture I noticed this would often have a lot of 0s on both sides for each row, and that the sculpture was mostly vertical, which meant building it with Y as the main axis would be wise, so I changed the notation:
y would move to the next block in Y, not putting a cube (old 0)
z would move to the next Z coordinate, and go back to 0 in Y (to indicate I’m done with this column, thus avoiding many trailing 0s)
x would move to the next x coordinate, without making a block, and reset both Y and Z, immediately jumping to the next “slice”.
a would be my new black cube
b would be dark gray (This is when I noticed there were multiple shades of grey on the sculpture, maybe more than 2 but I decided to stick to 2)
c would be light gray
d would be white
To simplify it a bit further, I thought I could put digits in there, which I would use to multiply the next letter, so ‘aaaaaaa’ could be written ‘7a’
I opened as many reference photos as I could find on google and started typing… first column…let’s see where is the corner… looks like the minimum X value is for some blocks in the back, ok the first column is empty: ‘z’, oh, actually the first 12 columns are empty, but my syntax only supports a single digit to multiply the characters, fine, let’s do ‘9z3z’, that’s the same as 12z.
After about 25minutes of this exercise, I had maybe 10% of the sculpture completed, and any mistake was hard to identify and fix. I counted the total dimensions of the sculpture and realized I would need to define a total of 14652 values (including empty blocks) and scratched this methodology.
(Spoiler alert: After I found a different solution, I wrote some code to automatically convert my data back to the format above, which does have the advantage of being easy to share: See it here)
My next thought was to do something in Houdini, where I had done “Voxelizing” work in the past, I could create some geo there, convert to voxels, export back to Nuke. Trying to open Houdini I noticed my license expired a couple of days earlier. Plus it felt like cheating.
Having played Minecraft recently, I felt like it would be the perfect editor to place the cubes as desired. A quick google search for “export Minecraft models” pointed me at the structure block, something that was added between the last time I played circa 2014 and the time I played a couple of weeks ago, which allows to import/export Minecraft builds from a world to another. A bit more reading told me that it created files with the .NBT extension and the wiki details the specs of the format, so it would be possible to extract the data.
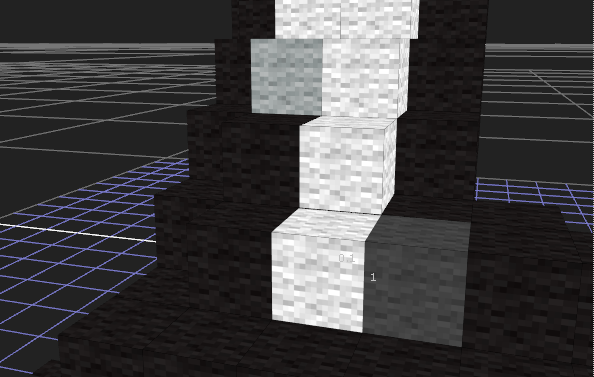
It was time to get building, I fired up Minecraft, grabbed my White/Black/Grey wool, and got to it. (While it would have been fun to build it in Survival mode, having to raise sheep to collect the wool and all, at this point I had almost been working on this for an hour and wanted to wrap it up, so Creative mode it was).
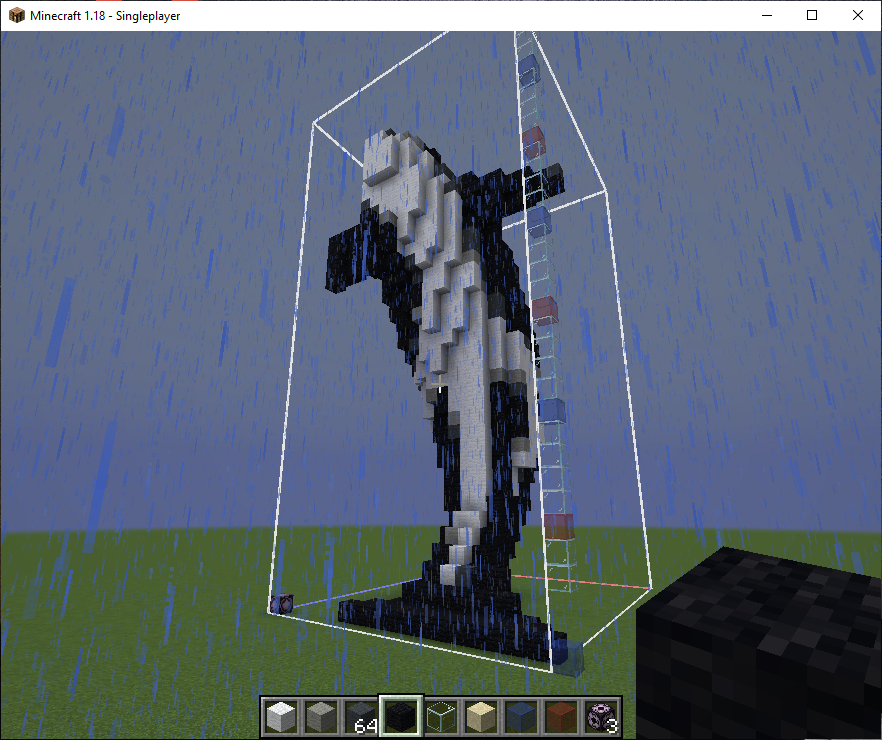
The complete build, notice the bounding box added by the Structure block.
It took around 1h to build in Minecraft. I did my best to be faithful to the original, but certain angles were hard to find clear photos of, so I might have taken some liberties around the back and top of the sculpture.
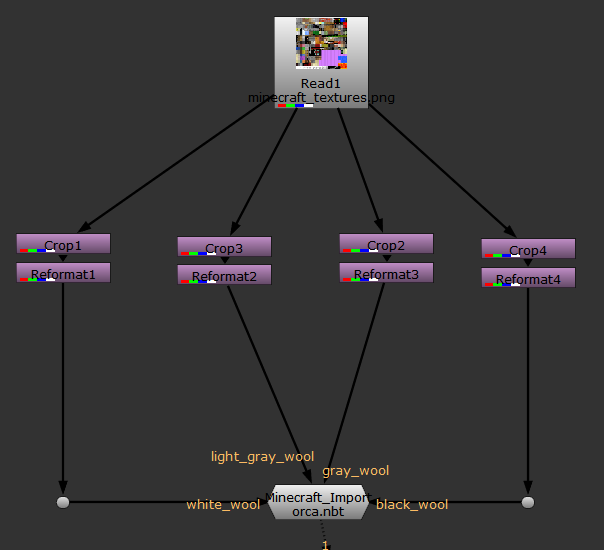
I exported the file and started looking into ways to read it in python. With just a short google search I found https://github.com/twoolie/NBT/blob/master/nbt/nbt.py, which allowed exactly what I needed.
The files contain the dimensions of the object, a palette which indicates the types of blocks used, and the 3D coordinates for all blocks, including empty blocks (air).
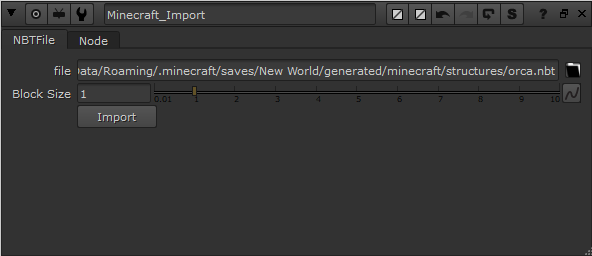
I make put my code in a python button on a group node, and TA-DA! A Minecraft importer was born. It’s probably completely useless, but you can get the node here:
https://gist.github.com/herronelou/7a3f7120bb6bd471c11c8531a06326da
It looks like this:
Control Knobs
Once you click import, it adds input for all types of blocks found (except air and the structure block itself, you can change that in the code if you need to).
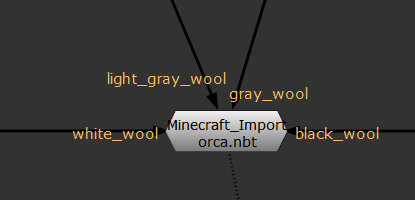
The inputs added after import
You can load the texture file from Minecraft itself and apply the textures for each input if you desire a more authentic Minecraft look. In my case I didn’t I was trying to match the original sculpture, not the Minecraft version, so I used constants. It would look like this:
Instead of rendering a single image, I thought it would be cool to have a looped turntable, so I setup a rotating camera. It would only take 5 more lines of code to add appearing and disappearing scale keyframes on the cube, so I did that too.
So…, to summarize, I spent over 2h making a picture for a LinkedIn post, then another one writing about it during an already busy time. At least I had fun, and hopefully you can too.
awesome, love fun projects like these