
Even though I usually like to post about Compositing, I’m doing a little exception this time.
I recently had to help a student create Fur for her personal project, and I got surprised how few tutorials were present online for the Xgen/Vray Combo.
Some sort of Bug prevented us to make any progress for a long time, and even after we discovered what was causing it the process wasn’t as straightforward as we thought.
I’m writing this tutorial as a step-by-step manual for those who would also struggle to get a custom color on Xgen hair to render in Vray.
Hopefully this will be useful for some.
1- Setting up XGen to see Vray
First we need to load the Plugins. Open Maya (with a new scene) and load the plugins. Load Vray and XgenVray, then XGen.
It is necessary to load XgenVray before we launch XGen, otherwise XGen won’t see Vray as a Renderer.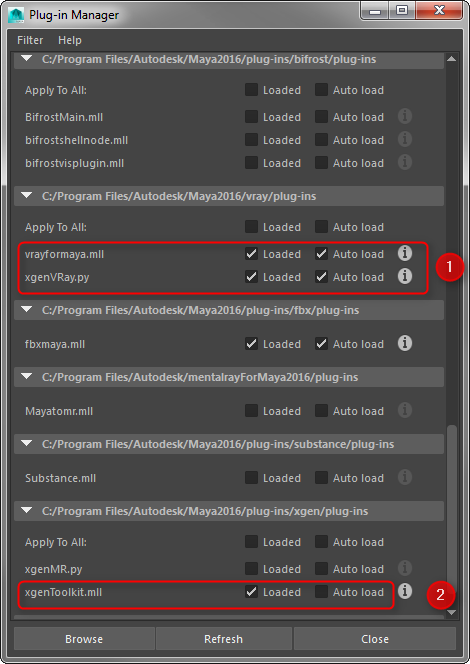
2 – Create or Load your Geometry
No secret here, I’ll use my awesome modeling skills and create a Sphere.
3 – Create your XGen Fur
Well, this is not meant to be a full on XGen tutorial, so I’ll only touch the basics here.
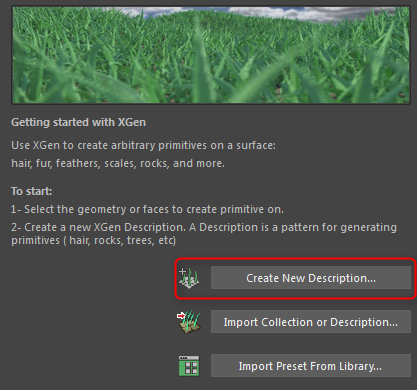
a) Click the Xgen icon in the XGen tab
b) Select the Geometry (or Faces) you want to grow hair on
Important! There is a bug with the current version of Maya and Vray
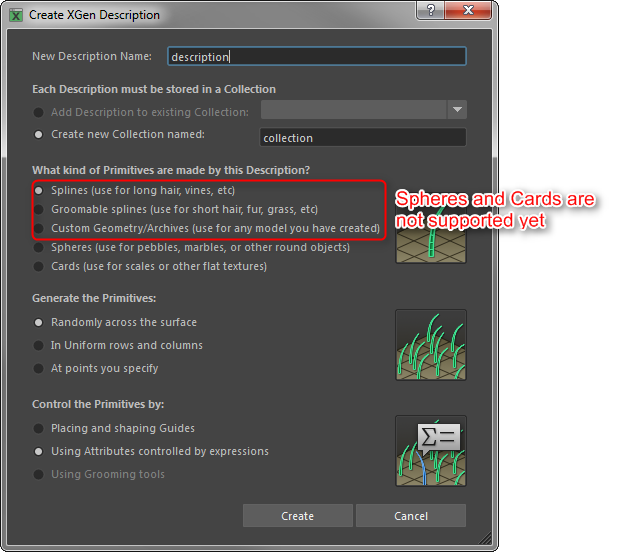
c) Create new Description (Create the Fur)
Pictures are worth a lot of words:
Make Sure Vray is visible to XGen and set it as renderer: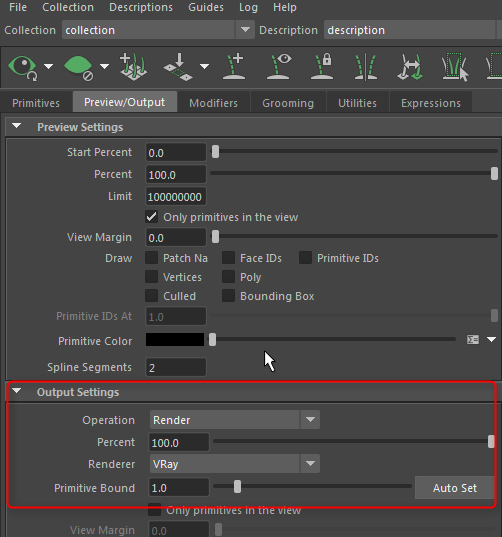
d) Do your Grooming or whatever you were planning to do on the hair.
In my case, I’m just increasing the density a bit, adjusting the length and taper, and adding a noise Modifier.
I end up with something that looks like this: 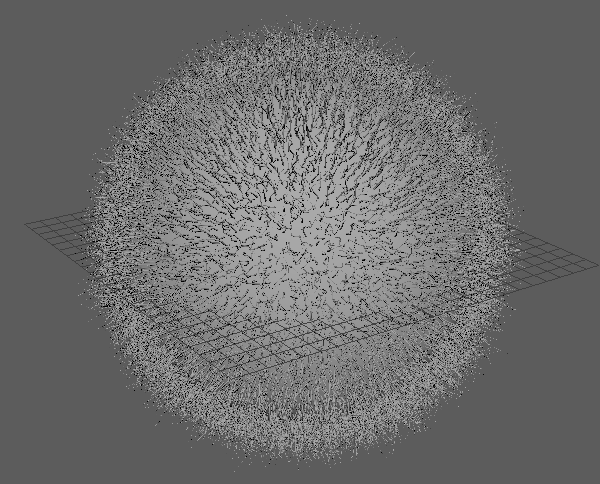
4 – Color the hair
In order to color the hair, Vray uses custom shader parameters root_color and tip_color.
If you only create one of the two, the whole hair will be colorized.
a) Create the custom Map
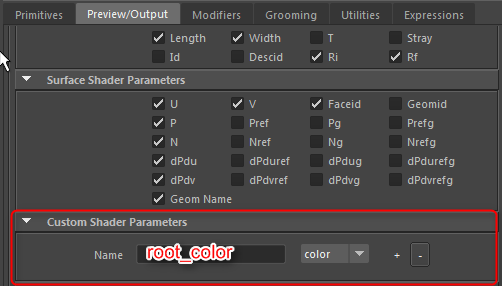
In “Custom Shader Parameters”, in the name field enter “root_color”, change the type to color, and click the “+” icon. Then, click “Create Map”.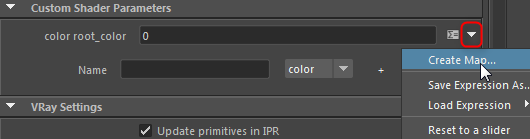
Choose a resolution. This will be a PTex map (not UV map) and the resolution will be dependent of this value. I went for 400 sort of randomly, assuming it would be big enough. You can change it at any time by clicking the little expression icon.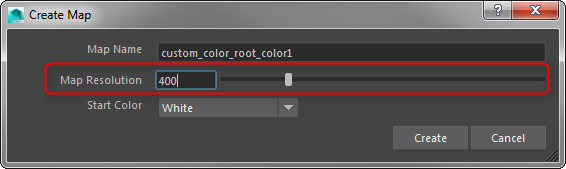
At that point, you will see the sphere becoming white, and the 3D paint tool will be active.
If you want to paint the color yourself, that’s fine, click the little paint icon next to the Custom Parameter.
In my case, I want to use a texture file. If you look into the Hypershade, you will notice a texture and a material have been created for you. This does not happen if your original object had a Vray Material applied! That is the bug I mentioned earlier. 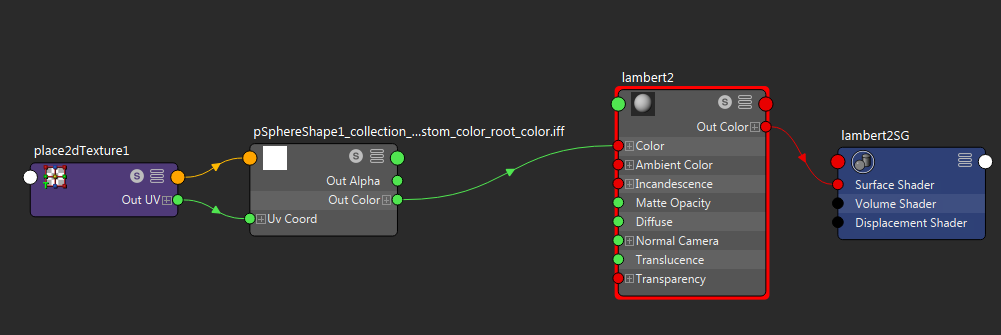
Click the Paint icon. You can now paint a custom color if you want to. (This step might not be necessary, but I failed last time I omitted it.)
Now in the Hypershade, double click the texture Map (pSphereShape1_collection_…stom_color_root_color.iff in the image above), and browse to the texture you’d like to use instead.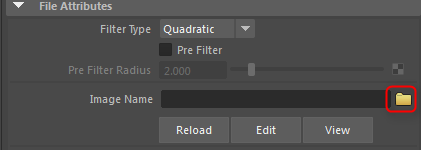
Note: The color management might not be available, in which case you’ll want a texture in Linear color.
Make sure you click the little save icon to apply that map to Ptex.
It will look like nothing happened. However, if you browse to the right path, you’ll notice you now have a ptex file.
Repeat the operation with “tip_color” if necessary. I will skip it, so my root_color will be applied on the whole hair.
5 – Render It
In order to render in Vray, I will change my renderer to Vray, and add a VrayLightDome to get some light in there.
At that point, it’s still rendering as a grey hairy ball, but at least it’s rendering.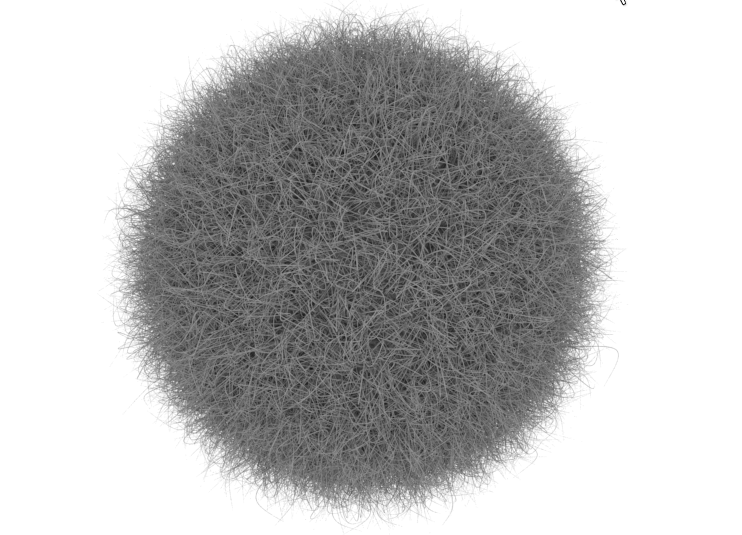
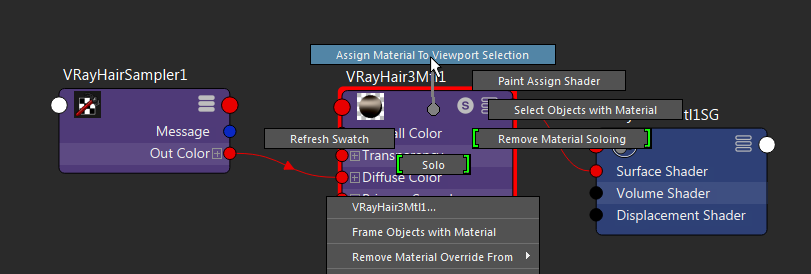
a) Create a shader
I will use a Vray Mtl Hair 3 Shader. In the diffuse, I attach a VRayHairSampler.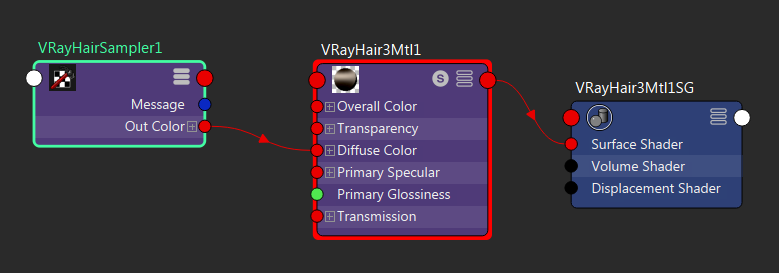
The hair sampler is the node doing the magic, it’s not very clear to me exactly how it links to the PTex map, I’d like a bit more documentation on it, but somehow it can read some attributes of the XGen hair, and will recognize root_color and tip_color maps as such, and output them as Out color.
b) Assign the shader
Select the description, and assign the material to it:
c) Tweak your lighting / Shader, and Render
I replaced my dome light with two Rectangle lights, and removed the default brown color in the Hair material speculars.
Here is the “final” render: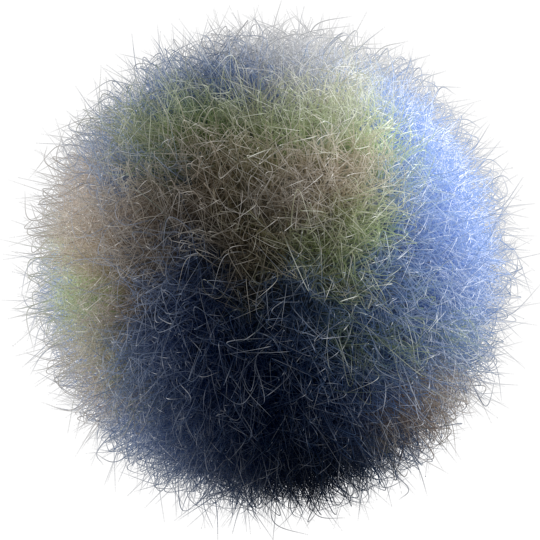
A magnificent hairy Earth.
Hope this Tutorial will be helpful for some. The process isn’t particularly intuitive and could be improved greatly, but for the time being we don’t have many options.
If you know a better way feel free to comment and let me know.
Ow thank you thank you…finally i got it right….it works!!!
Glad it could help. Cheers.
Thank you so much! I was about to go crazy until I found your tutorial!
Thank you for this. Much appreciated!
Thanks! The VRay Hair sampler node is a black box. Thanks for shedding light on how it actually works!
Thank you for this tut ,Can you tell me if i use Custom geometry the vray shader is not supporting.
I don’t have access to Vray where I currently work so I would have to guess. You mean using custom geometry instances instead of hairs? I would think in that case each instance will take on the shader of the primary Geo. There might be ways to add dynamic properties to the shader using part of the workflow above, but I would have to look deeper into it, which I can’t these days.
The Vray and Xgen docs might be a good place to start.
yes correct instead of hair i m using Custom geometry,i ll try to find dynamic prop any way thanks erwan.
Thanks for this! How did you ever discover the process?
Reading the documentation, and a fair amount of trial and error.
Many thanks Mr Leroy, Your tutorial was great and it helped me a lot.
Help, I followed the steps but textures don’t get rendered on the hair… but I can see the specular etc (and other passes) from VRayHair3Mtl.
The diffuse itself is black… it’s like it’s not loading the map, i checked many many times already all the ptex files.
Has anything to do with the fact that I’m using maya 2017..?
Hi.
It’s not impossible that things have changed.
I have not done hair since I wrote this tutorial so I’m afraid I will not be of much help.
Hi.
Can you explain further more about the last step which is the ‘removed the default brown color in the Hair material speculars’ . I don’t get what it means and now I am stuck at the final step.
TQ.
Hi.
This was just that by default the vray hair shader assigns the color brown to the specular, I didn’t want that to happen so I changed it to white I think. You don’t have to do the same, you can put any color you like.
Cheers
Thank you very much for the tutorial. Really, the task of using Xgen with Vray is very laborious. I have been studying a lot in the last days and your tutorial managed to solve the doubts.